introduction
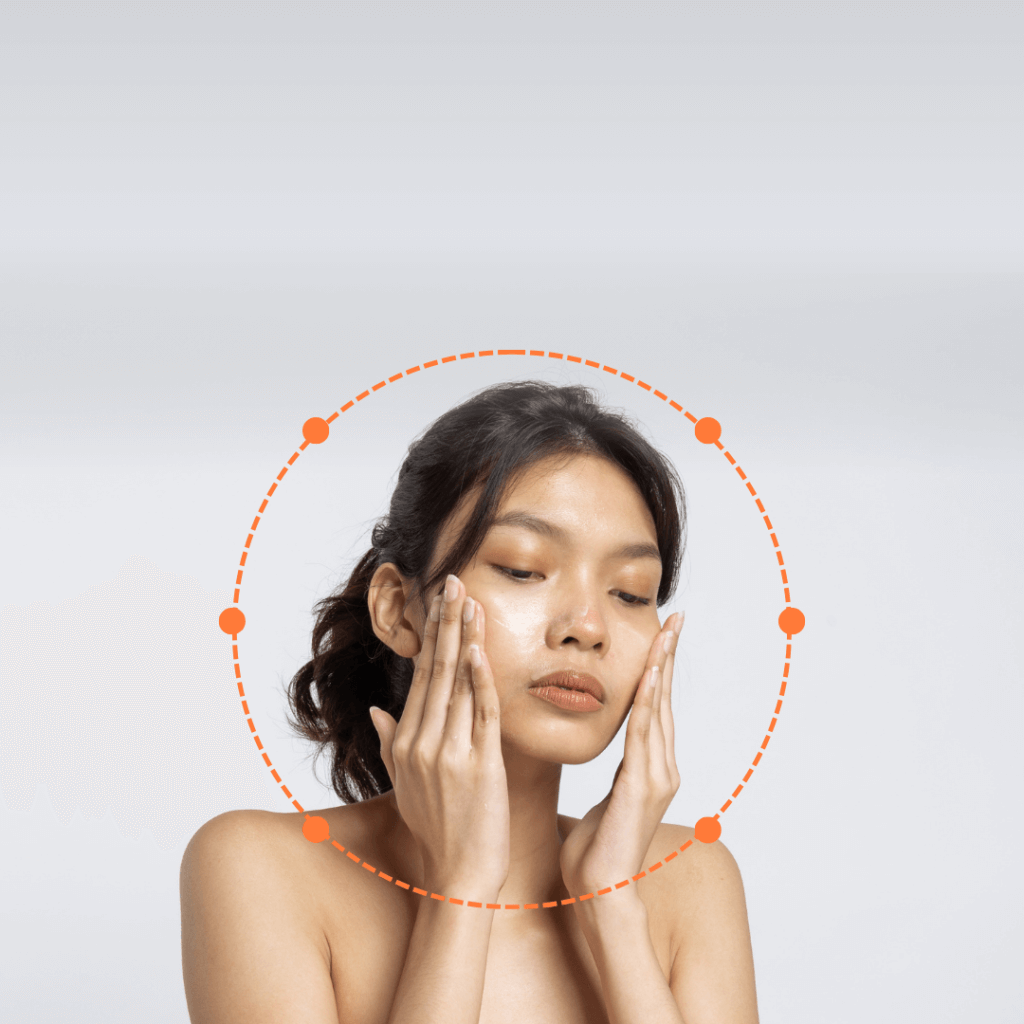
Regular practice of yoga does not cause skin aging. And also wrinkles and fine lines are reduced.
As we age, our body begins to lose its luster, elasticity, and strength. Over time many people start developing high blood pressure, diabetes and heart related complaints. This rule also begins to appear in our body. Symptoms such as wrinkles, fine lines and pigmentation begin to appear on the face. Let us look at the following six asanas to get rid of aging. It will help to slow down your aging and make you look younger. So now let us see those six asanas.
1. virbhadrasana
How to do
1. Stand with your feet wide and bend your left leg fifteen degrees, bringing your right leg to 90 degrees.
2. Place the heel of the right foot in the center of the left foot.
3. Inhale, bring both hands up to shoulder height and raise your palms. And keep the arms parallel to the ground.
4. Exhale and bend the right knee. Bring the ankle and associated knee into a straight line.
5. Take care that the knee does not go past the ankle.
6. Focus on the right middle finger by turning your head
7 Extend your arms forward while settling into this mudra.
8. Push your pelvis down.
9. Inhale and slowly come up by releasing your right knee.
10. Bring both your hands down while exhaling.
11 and take some rest before repeating this asana on the other side

virbhadrasana
Benefits
Virabhadrasana stretches your chest, lungs, neck and stomach well. It also helps improve flexibility and eases your range of motion.
People who sit for long hours develop pain, tension and stiffness in the lower back. Virabhadrasana thus stretches and strengthens your back.
The thighs and calves work to expose the knees and ankles. And also increases your performance.
Regular practice of Virabhadrasana increases blood circulation. And also helps reduce stress and anxiety. Calms your mind and also helps reduce the risk of neurodegenerative disorders.
This asana helps in increasing your focus and concentration.
Who should avoid Virabadrasana
- Those people suffering from Spinal disorders
- Those people suffering from High blood pressure
- Those people suffering from Diarrhoea
- Those people suffering from Pain or recent surgery in the legs, back, shoulders, or arms.
- Those people suffering from Arthritis
- Those people suffering from Cardiovascular disorders.
2. Trikonasana
How to do
1.Keep your knees straight and three feet apart and stand straight
2. Inhale with your eyes forward and extend both your arms out to the sides, in line with your shoulders.
3. Rotate the right leg to the right.
4.Exhale and bend to the right side, placing the toes of your right hand behind the right foot. If you are doing this for the first time and find it difficult to touch the right foot, touch the right knee instead.
5. Bring your left hand in line with your right hand.
6.Turn your head to the left and try to focus on the middle finger of your left hand.
7.You can hold this position for ten to fifteen seconds. Pay attention to whether you are breathing normally while holding it like this.
8.If you are doing this pose for the first time, hold the pose for ten to fifteen seconds as long as you are holding your breath as it becomes difficult to hold the pose.
9.After 20 seconds inhale and come up. And also repeat this asana on the left side but before that take some rest.
Benefits:
1.Benefits for Feet:
Stretching the leg muscles for this festival also helps in the growth of thighs and legs. Muscles at the back of the thigh may increase flexibility.
2. Benefits for Spine:
This asana involves bending to the side thus improving flexibility by stretching the spine.
3. Benefits for Digestion:
Indigestion can occur at any age and can be a common body complaint. Do this asana if you suffer from stomach ache. It is beneficial for indigestion.
4.Benefits for Buttocks:
It helps in loosening the hips as well as stretching the hips. It helps to become a laborer. And improves hip flexibility.
5. Benefits of Trikonasana:
Improves blood circulation in the body, reduces problems like blood pressure, stress and anxiety. And helps to increase lung capacity.
Strengthens waist and back muscles. Increases hip flexibility. Because it involves stretching the hips.
should avoid Trikonasana
Those people suffering from migraine, diarrhoea, low or high blood pressure, or neck and back injuries. Those with high blood pressure.
3 Vayu Nishkasana
How to do
- Squat with your feet wide apart
2.Step your feet with your toes under the top of your big toe.
3. Place the upper hands on the inside of the knees with the elbows slightly bent.
4. Your eyes should be open during this practice.
5. Inhale as you move your head back. And then look upwards. This is the beginning of the condition.
6. While inhaling, keep the knees straight and raise the hips and move the head forward towards the knees and hold this position for three to five seconds.
7.Exhale and return to the initial position.
Benefits:
1. It has a good effect on the nerves and muscles of the thighs, knees, shoulders, arms and neck, and also massages the muscles.
2. Works to tone the entire spine and the muscles of the arms and legs.
3. It helps balance the pressure between the joints by pulling them apart.
4. All the nerves of the back are stretched and toned.
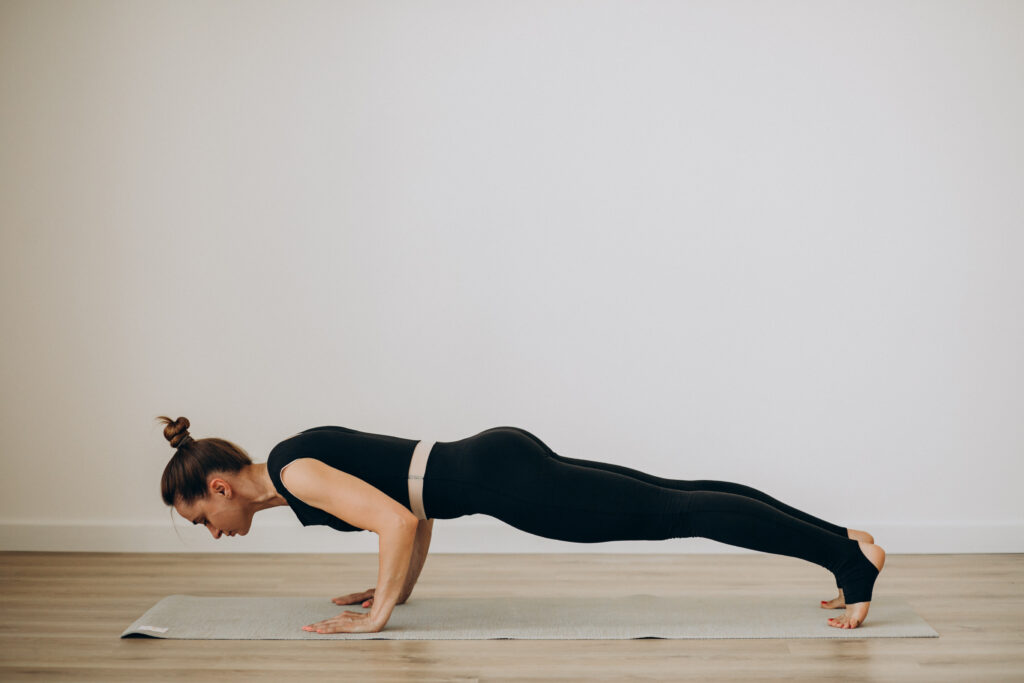
4 Plank pose
How to do
1.Start the asana by taking a four-legged pose on the ground. Keep your wrists under your shoulders and your knees close to your hips.
2.Strengthen your outer arms by closing your fingers on the mat. Keep the photo straight and note that your middle fingers should be forward
3. Push your toes off the ground with your right leg back and bring your left back and stomp your right leg. Separate hip-width apart.
4. This is a push-up position in your school from head to heels in a straight line.
5. Keep the body off the ground and also tuck your thighs and engage your buttocks.
6. Don’t drop your hips and try to keep your neck in line with the bead and look forward.
7. Keep breathing slowly in this pose.
8. Hold plank pose in a relaxed position as you gradually increase it as you gain core strength.
9. Maintain alignment to avoid injury during this asana. When you come out
Gently bring your knees to the floor. And get into a relaxed state. And also feel the strength in the body.
10. Assume child’s pose to cool the body and calm your mind.
Benefits:
strengthens the lower back muscles.
builds the upper body and the core strength.
helps to strengthen your upper arms, shoulders, and wrists.
is a foundation for arm balances.
Who should avoid Plank Pose
migraine, high blood pressure and vertigo ailments avoid this pose.
dizziness and imbalance. Carpal Tunnel Syndrome patients avoid this pose.
5 Butterfly Pose
How to do
- Come into an asana position with your legs folded by your sides so that your toes touch each other. And touch your heels to your hips and thighs. Try to keep your hands in place of your fingers. You can place your hands under the feet for support.
2. Try to bring the heels closer to the thighs. The thighs and pelvis and the area between the thighs and also the genital area can be stretched.
3. Keep your back straight to strengthen the lower back. Then take a deep breath and release. Bend your thighs and knees downwards and flap your thighs like a butterfly.
4. Start this process slowly. And gradually increase its speed. Keep breathing steady.
5. You lean forward and place your forehead on the floor and bring it close to your toes.
6. Exhaling while bending towards the floor can increase the tension between the thighs and the abdominal area. Then you come into a relaxed state.
benefits
increase the flexibility of the spine.
help to tone the lower body.
relieve physical and mental stress.
improve digestion and relieves constipation.
relieve tiredness.
lower the pain in the legs and knees.
improve reproductive function.
high blood pressure.
who should avoid badhhakonasana
a tear of the ligament, worn down joints or rheumatoid arthritis, Baddha Konasana must be avoided. Also, students who have undergone knee, ankle, or hip surgery should avoid this pose.
6 Anulom Vilom
How to do
1.Anulom Vilom is a simple meditation form of Pranayama. Alternate breathing is through the nostrils. First you breathe from one side and then you breathe from the other side. This is a breath control exercise.
2.One nostril should be closed and the other nostril should be closed while exhaling. This process needs to be reversed and repeated.
3. This type of exercise improves physically. And there are psychological benefits. It is helpful in reducing stress and also improves blood circulation. This asana is performed for so many amazing benefits. It has no side effects.
Benefit
1. Regular practice of this asana helps in purifying the blood in the body. It also helps improve blood flow.
2. Strengthens your respiratory system.
3. Helps relieve physical and mental fatigue and calms the mind.
4 Regular practice cures the problem of snoring.
5. The oxygen level of the body increases.
6. Maintains proper body temperature.
Who should avoid anulom vilom?
Those people using medication for asthma or blood pressure must consult a registered medical practitioner before starting the practice
Conclusion
Aging cannot be stopped but having some of the above can prevent the signs of aging. A regular practice of yoga can help you look younger by helping to slow down your aging process.